Course #5: Major Scale Improvisation


1. Major Scale Improvisation Intro |
||
2. The Major Scale |
||
3. Diatonic Modes |
||
4. Eb Saxophone Lesson |
||
5. Melodic Ideas Alto |
||
6. Theme Development Alto |
||
7. Bb Saxophone Lesson |
||
8. Melodic Ideas Tenor |
||
9. Theme Development Tenor |
||
10. Chords |
||
11. Adding The 5 Chord |
||
12. Simplifying the Chord Chart |
||
13. Alto Solo |
||
14. Tenor Solo |
||
15. Moving Ahead |
In This Section
The Major Scale
Diatonic Modes
Chords
Adding The 5 Chord
Alto Solo
Tenor Solo
Moving Ahead
Major Scale Improvisation Course
Improvisation techniques built entirely on simple but important concepts of the 7 notes of the major scale
Up Next Is How To Play Killer Blues And Rockin’ Sax Solos With 7 Notes Or Less. This is the standalone ebook/video course I wrote several years ago. It has been selling on this website and on Amazon in 13 countries around the world.
Major Scale Improvisation Course
Part One
Do This First
Download and print out the concert pitch version of “What Does it Take” to follow along with the video lesson below:
![]()
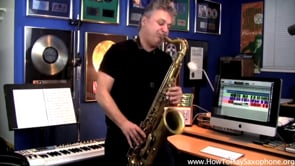
After you print out the music chart, follow along with the video lesson below.
The lesson deals with the F major scale because that’s the key of the song we will work with. F is the concert key and so it is not the scale you will play on your saxophone. You will actually play the transposed key which is G or D, depending on which saxophone you have.
Don’t worry about this yet. Just follow the lesson to grasp it’s concepts first. Music transposition is actually easy to learn and do because it’s just simple mathematics. For example, you will learn that the F major chord consists of the 1, 3, and 5 notes of it’s scale, which translates to the notes F, A, C .
Now transpose this up a whole tone to the G major scale. You now know that a major chord is built by piling the 1st, 3rd and 5th notes of the scale on top of each other, therefore the notes are G, B, and D. Once you know all the notes of any major scale you can easily figure out it’s major chord.
Every teacher will stress the importance of knowing your scales. Why? Because from there you will know the key signature which means you’ll know the key a song is in. You’ll also be able to figure out chords from knowing the major scale as I just explained in the previous paragraph about mathematics.
In This Video:
- The major scale
- First steps to improvising
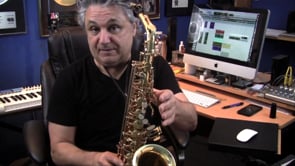
- Relationship of saxophone keys to concert key
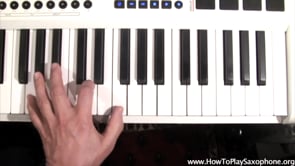
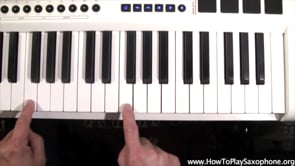
- Major scale improvisation demonstration on keyboard
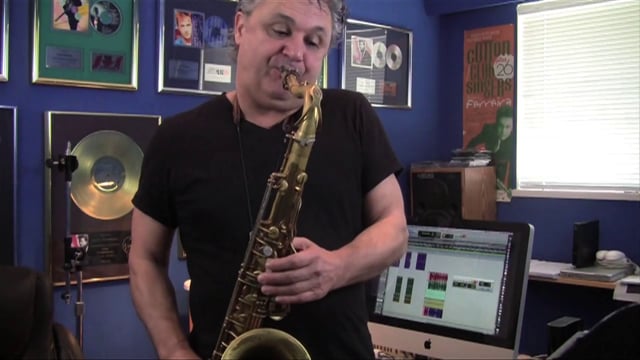
- Tenor demonstration of playing the major scale patterns over chord progression
- Alto demonstration of playing the major scale patterns over chord progression
- As saxophone players we need to know and understand the relationship between the key a song is in and what key that is for which type of saxophone we’re playing.
Later in the course I will give examples and demonstrations on both alto and tenor but in the real world you must get used to relating to the concert pitch of a song and automatically be able to transpose that key to what it is for your Eb or Bb sax. Yes, I know…of all the beautiful things about the saxophone this is not one of them!
Most of the theory is explained on piano because it’s visually easier to do and see. Each exercise is written out below the videos in concert pitch and in both saxophone keys:
F Major Scale – this is the concert key the song is in

G Major Scale – this is the key for Bb saxophones (G is a major 2nd above F)

D Major Scale – this is the key for Eb saxophones (D is a minor 3rd below F)

Pick the scale that’s right for your saxophone and start practising it. Do this until you can play it smoothly over the entire range (not just one octave). Then play around with it over the backing track below.
Don’t over think it at this stage, just play it up and down in all ranges of your sax trying to fit in with the band as best you can. Even though it’s a simple exercise you can still try to make it smooth and musical.
Download the loop backing track
![]()
Practice each mode (2 bar phrase) up and down on your saxophone. To truly incorporate these into your improvisational skills, you must be able to do these smoothly and from memory. Technically, each mode is no harder to play than the regular, original major scale. It’s just a mental thing of getting used to starting and stopping on the different notes of the scale. All notes in between are the same.
F Major Modes – Concert key

G Major Modes – For Bb Sax

D Major Modes – For Eb Sax

Chord Tones With Their Corresponding Modes
Below are the two chords fully written out so you can see each of their notes; 1, 3, 5, 7.
Under them you can see what I played in the video lesson; the appropriate mode for each chord tone.
This is the “KEY” point for this lesson; Learning to match up the modes with the chordal tones.
As you practice this along to the backing track you must be aware of the chords as you play along so you can match the modes correctly with the chords as they go by. For some people this may not come instantly. If you have some trouble just simplify the process by playing only the first note of the chord or mode until you’re changing at the right time.
As you get better and are able to play them as I suggest below, start experimenting, mixing them around and finding favorite notes and finally riffs that appeal to you. Remember, this is a process and will take daily practicing over the next several weeks and months.

Using the Right Modes Over the Right Chords
Download this exercise sheet
![]()
Chord and Mode Chart

Work with the video below to start creating your own simple melodies by using the modes you have learned:
A technique used by composers and improvisers to build upon a simple 3 or 4 note idea
The notes below are written out exactly as played in the video above. Study the themes to see how each one is developed from the previous one. Notice the different note additions and how they relate to the chord and the mode. Learn to play this yourself and start adding to it with your own ideas.
Download this exercise sheet
![]()

Now we add another important tool; the seven diatonic chords that happen naturally in a major scale. Just like the diatonic modes, as we go up the steps of the major scale we can build a different chord on top of each note. Study and learn these chords. As you’ll learn in Part Two, they are the foundation of our music.
After learning the scale and it’s modes, chords are the most important thing. You have learned how a major scale has a set of modes. A major scale also has a set of chords. Whereas a scale or mode is built upon the degrees of the major scale’s notes going up step by step, chords are built using intervals of 3rds.
We build a chord on each tone of the scale by simply piling 3rds on top of each other. First we’ll use 3 note chords and then 4 note chords as shown below.
3 Note Chords
C

F

G

D

As you can see, these chords are all built on 3rds. Get a good handle on the normal 3 note chords above, then work on adding the 7th note as shown below in the 4 note chords:
The Seven Diatonic, Natural Chords of a Major Scale or Key:

4 Note Chords
C

F

G

D

Adding The 5 Chord
At this point we have covered all the chords of the song. Below is the full arrangement backing track as opposed to the 1 to 4 chord loop we have been working with in the first 3 lessons. Follow your sheet music and incorporate the 5 chord as it happens in the 9th and 12th bars.
Download the full backing track
![]()
Simplifying the Chord Chart
Watch this video to learn a few simple exercises that will help you play along with the chord progression
Alto Chord Progression for What Does It Take

Tenor Chord Progression for What Does It Take

Part Two
Listening to, and Analysing Solos Using Scales, Modes, and Chords
Moving On…
 If the art of improvising has been somewhat of a mystery, I hope it’s really beginning to unravel for you now if you’ve been learning the lessons up to this point. The two most important elements that we can use for improvising are scales (and their modes) and chords.
If you have studied and learned and then actually practiced this material so far then you’re well on your way to finally get a grasp of this wonderful thing we call improvisation.
If you’re still at the skimming stages then the mystery is yet to unravel itself… but keep forging ahead with learning these modes and chords and you’ll get there.
This next section (Part Two) is devoted to help you really open your eyes (and ears) to the possibilities of what putting this stuff into action can sound like.
You Are Not Alone
Every person that has aspired to become a saxophonist has spent a lot of time copying other players that were more advanced than they were. Whether their names were John Coltrane, Dexter Gordon, Charlie Parker, or Kenny G, this is a fact and the best way to learn a solo. I’ve read stories about saxophone greats like Charlie Parker learning solos from established sax players such as Coleman Hawkins by getting their records and copying their solos from playing them over and over on a record player.
When I was a young saxophone student I worked a lot at copying other people’s solos. Although I also spend some time dropping the turntable needle on the right spot of the record, this task became easier by using a tape recorder. These days there are even easier ways.
Your Advantage
Learning the elements in part one of this course is the most important thing you can do to learn how to improvise. Personally, I always learn better from actual demonstrations and examples. In this section I want to give you some of that, both on the alto and tenor saxophones.
Exercises are a very important and necessary thing. Learning these exercises is a must and will take some time. But at some point you have to transform exercises into melodic ideas. When you have access to actual examples as I have laid out in these next videos, many of you will gain important additional insight on how to bring these elements together and make this transformation happen even faster!
A helpful way to transform the exercises you’ve been working on into good solo ideas is to copy other players and analyze what they do. Once you master the techniques in this course you’ll find this easier to do because you’ll be able to identify and relate to the proper scales and keys of a solo you may attempt to copy.
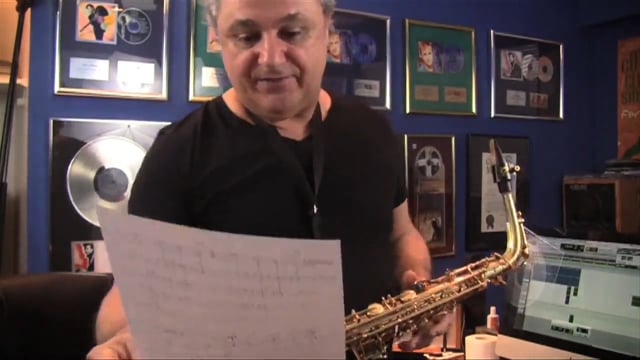
I recorded 4 choruses (12 bars x 4) using the exact techniques I presented in the 4 lessons in part one of this course. I then transcribed it note-for-note so you can see exactly how these techniques work in my soloing efforts.
Go ahead and watch, listen, and analyze the chart of what I recorded. When you hear a line or riff that “speaks” to you, copy it or add your own twist or style to it. Practice with the backing track and try to use it yourself.
Tip – sometimes when trying to copy someone’s lick, I will play it over and over throughout the entire 12 bar progression in order to really learn it. Reading it at first and then playing it by memory. I find that to really learn a lick it has to be memorized. Then I’ll try and play it where I think it will work best… over which bar or chord. It’s this type of experimentation that can help build confidence.
Also pay close attention to the chords and which notes are used there because even though the modes and chord riffs I used are interchangeable, they are more effective when the majority of the notes match the chord the band is playing. Just as I discussed in lesson two covering the modes and how to use them.
Download the music sheet
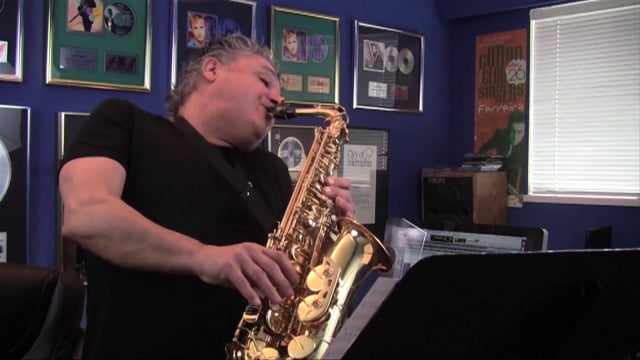
The best way to transform the exercises you’ve been working on into solo ideas that work is to copy other players and analyze what and how they do it. For this tenor solo I recorded almost 4 choruses (12 bars x 4) using the exact techniques I presented in the 4 lessons in part one of this course. I then transcribed it note-for-note so you can see exactly how these techniques work in actual music.
Go ahead and watch, listen, and analyze the chart of what I recorded. When you hear a line or riff that “speaks” to you, copy it and make it your own. Practice with the backing track and try to use it yourself.
*Tip – sometimes when trying to copy someone’s lick, I will play it over and over throughout the entire 12 bar progression in order to really learn it. Reading it at first and then playing it by memory. I find that to really learn a lick it has to be memorized. Then I’ll try and play it where I think it will work best… over which bar or chord. It’s this type of experimentation that can help build confidence.
Also pay close attention to the chords and which notes are used there because even though the modes and chord riffs I used are interchangeable, they are more effective when the majority of the notes match the chord the band is playing. Just as I discussed in lesson two covering the modes and how to use them.
Download the music sheet
![]()

Have a look at the song “And I Love Her”. As discussed in the video it has a very typical chord progression of 1 2 6 4 5 which are all common chords in the key of F major.

Here are the chord progression examples as shown in the video :
1, 2, 6, 4, 5 1, 6, 4, 5 1, 4, 5
Other common chord progressions can include:
1, 5, 6, 4 1, 3, 4, 5 1, 2, 5 1, 5 1, 4
You’ll notice that all these chord progressions consist of the natural chords found in the major scale as discussed in lesson three. This means that we can use the modal and chordal lesson techniques over any of these progressions, which are exactly how most popular songs are constructed.
Also note that in most music charts we use the Roman numerals to notate chordal degrees:
1= I 2= II 3= III 4= IV 5= V 6= VI 7= VII
So a typical notated chord progression of 1 6 4 5 would look like this: I VI IV V
Know Your Chords!
To continue ahead with your improvisation journey you must really grasp the concept of chords. This is not complicated. As you have seen in lesson three and above, there are only 7 chords to deal with.
The one, four, and five chords are usually the most common in most songs and are hi lighted in blue to the right. The minor chords are usually secondary, these are the two, three, six and seven which is a double minor, meaning both it’s 3rd and 5th intervals are both minor which makes it a diminished chord and is used less than the others..
Once you learn this you’ll be able to analyze most any song you come across.
The Seven Diatonic, Natural Chords of a Major Scale or Key:

Test Yourself!
Identify these song’s keys and numerical chord progressions
Most songs are written in one key and stay there. Sure, we hear a few songs modulating up a tone or half tone but most don’t. So, once you’ve figured out which key a song is in you can quickly scan it’s chord progression just to make sure.
Most times a song will start and end with the one (tonic) chord. Other signs are the 5 chord. So if you think the song is in C major look for some G and G7 chords, these are the 5 chord and they are used in almost every song. Remember as stated above, the two, three and six chords can be common as well.
Have a look through the chord progression of “Let It Be” and “You Are The Sunshine Of My Life” to the right. Identify the song’s key and chord progression. Write it out in proper numerical numbers like you saw in the lesson videos: 1, 4, 2m, 5M etc.
Then compare your findings with mine which I’ve included in the tabs below.
*Note – Don’t worry about the chord extensions such as maj7 and aug7 etc. Just look at the main chord name because extensions are just used to decorate the chord.
Let It Be

You Are The Sunshine Of My Life

Bottom Line…
The bottom line is that most pop songs are harmonically simple. What this means for you is that learning the lessons taught in this course will prepare you to be able to improvise over many many songs.
So go back and practice those modes and scales. Learn one key REALLY WELL and then move on to another key.
Closing Thoughts…
There are many more ways to use and explain modes. Most people don’t really understand them and so can’t use them. Jazz musician’s have more complex ways to improvise using them in different situations. What I’ve shared with you here is a straight forward approach that will enable you to get to know them and actually use them to improve your ability to improvise.
Is this it? No. In music there is always more to learn or another way to learn it. But as for beginning a journey into simple improvisation techniques this should be enough for you, at least for a while until you really grasp these lessons.
If you do move on to other songs, remember to analyze them first so you know what all the chords are. From there you will know what to do. It may still seem overwhelming now, but as you learn and memorize the modes and chords it becomes easier, and therefor ultimately more fun… and you’ll start to sound better!
cheers and good Luck!
Johnny Ferreira
© 2020 How To Play Saxophone. All Rights Reserved