Course #1-Part Two: Mini Course For Easy Music Notation Reading & Technique
1. G Note and Octave Key |
||
2. G Note and Reading Music Notation |
||
3. G Major Scale and Reading Notes |
||
4. G Scale Ascending Exercise |
||
5. Slurring Technique |
||
6. Eighth Notes and G Scale in 3rds Exercise |
||
7. Triplets |
||
8. G Major Chord |
||
9. Playing Your First Song |
||
10. Reading and Counting Rests |
In This Section
G note and octave key
G note and reading music notation
G major scale and reading notes
G scale ascending exercise
Slurring technique
Eighth notes and G scale in 3rds exercise
Triplets
G major chord
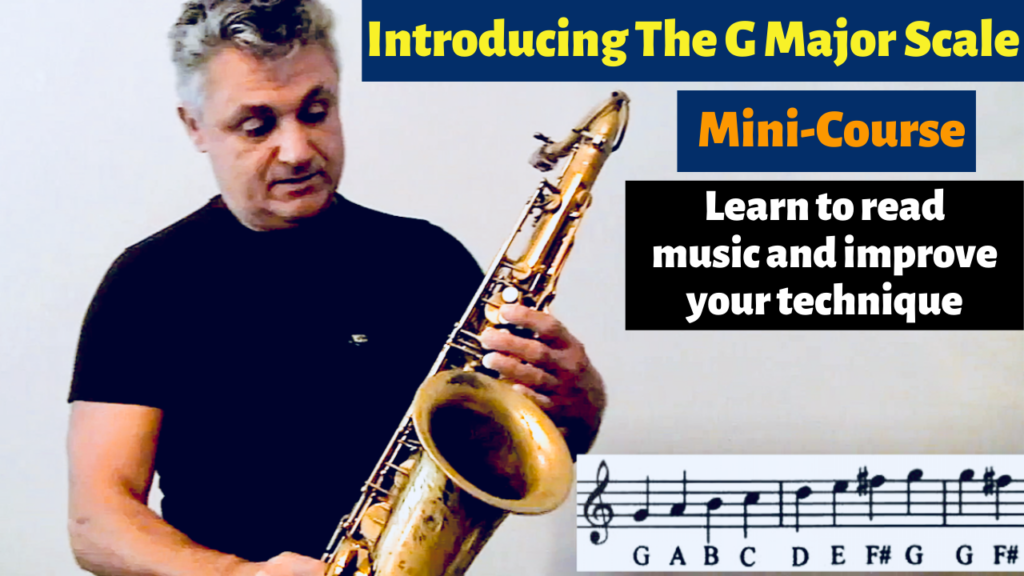
Introducing The G Major Scale
Following are 8 lessons covering exercises based on the G major scale and learning about notation. These will not only increase your technique but will also get you reading music notation…this is IMPORTANT!
New Bonus Section
The bonus section near the end of this mini-course dives into sight reading. When we read music we deal with two things; notes and rhythm. These exercises will help you with rhythm.
Mini Course For Easy Music Notation Reading & Technique
The next 8 lessons below revolve around the G major scale. You not only learn this scale but also about the octave key and some musical notation. If you’re not familiar with reading music, take this opportunity to learn. We start with the very basics and move along very gradually. Every lesson has video examples and instruction so you won’t have any problems.
Introducing The G Major Scale
Following are 8 lessons covering exercises based on the G major scale and learning about notation. These will not only increase your technique but will also get you reading music notation…this is IMPORTANT!
Play this G note exercise
This first exercise is playing a G for one bar. Below is the G as it sits on the musical staff, both low and high G – Grab your sax and play this low G. As you play it, count the 4 beats in your head and tap your foot – 1 2 3 4 in the steadiest rhythm that you can. A metronome can be useful for practicing these lessons. Although it’s only one note, you can spend some productive time making sure you are hitting it right and have it come out right each and every time. Start off by tonguing it, while holding it count 1 2 3 4 then stop it with your tongue after the 4th beat. Repeat the same for high G.

Hey…you’re reading music!
.
As you learn the fingerings you will also learn the musical notation because it will be included as we move along. Reading notes is easy, it’s easier than reading words and you can do that right?!
Notice that the only difference for the high G is the addition of the octave key.

The Octave Key
The octave key is located directly above the left hand thumb rest:

The octave key is not a note, but a key which when pressed releases a small pad on the neck and another one a little further down on the sax which open a small hole making it easier to play notes in the higher range of the horn – this includes all notes above middle C#. By pressing the octave key we can use the same fingerings for most of the notes as we do in the lower octave.
This “break” or “transition” between the low and higher octave which happens at C# to D, meaning the last note of the lower register moving to the first note of the upper register, can sometimes cause problems when going from one note of the low register to a note in the high range. Any such problems can be fixed by making sure you have good embouchure, air support and are smoothly and quickly hitting the D and other upper register fingering at the same time as the octave key. Spend time hitting the middle D from different notes: C# to D, C to D, B to D etc. Again, focus on what you are doing right when things are working. (There is more on this in the lesson video which has a link further down).
A little more on reading music and theory:
The musical staff has 5 lines and 4 spaces. A simple rhyme you can use to identify and remember the notes that sit on the 5 lines of the staff is “Every Good Boy Deserves Fudge”. The first letters of the words in this phrase represents the order of notes starting from the bottom line of the staff – E, G, B, D, F. As you can see, our G note is sitting right on the second line from the bottom:

The notes in the spaces of the staff are F, A, C, E. The helpful trick in learning these notes is to remember they spell FACE.

Let’s take a look at the 5 things that make up the musical notation for the single G note exercise from above:
- the 5 lines going across are called the staff
- the symbol on the far left that looks like a fancy letter S is called a treble clef. There are other types of clefs but the treble is the most commonly used and is the one us saxophone players use
- the number 4’s sitting on top of each other is the time signature, and since it’s 4/4 that means it’s 4 quarter beats per bar – 3/4 would mean three quarter beats per bar etc. Just simple math
- the circle (note) on the second line from the bottom means that it’s a G. This note is a white circle, which means it’s worth 4 beats within this one bar measure with a 4/4 time signature. We call this a whole note because it plays for the whole duration of the measure
- the circle sitting on the very top of the staff means it’s a G, but an octave (eight steps higher) than the lower G
- the double lines to the far right tell us it’s the end of the piece – one single line would mean it’s the end of the bar – in this example it happens to be both.
- There are more notes above and below these 5 lines and you’ll learn them all as we progress.
Get Rhythm!
Hey, the notes grew some legs! We have added stems to some of the notes below. As you saw above, the whole note has no stems, just made up of a single circle. When we color that circle in and put a stem on it, it’s now a quarter note, meaning it’s value is a quarter of a whole note. As you can see the first bar has four of these quarter notes to make it equal the whole note. The second bar has two notes that aren’t colored in but do have stems, these are half notes. They are worth one half the value of a whole note and twice the value of a quarter note. Again, it’s just simple math.
Check the 4/4 time signature on the left. Each bar therefore has to have notes that add up to 4 quarter beats, which they do.
First bar is quarter notes – second bar is half notes – third bar is a whole note.

The G major scale ascending and descending:

We are now going beyond the G major Scale. These exercises are all based on the G major scale and when done properly and often, each will help you to quickly improve your technique.
Gradually Ascending G Scale Exercise


Before going on to the next video lesson below learn how to count and play the 8th note.
So far all the notes we’ve been reading have been the whole, half, and quarter notes. Next we will learn how to read the eighth note which falls next in line because it’s worth half as much as the quarter note, meaning it takes two eighth notes to play one quarter beat in a bar – where we have 4 quarters making up a bar it would take 8 eighth notes to complete a full bar in 4/4 time.
Notice how we count them in the example below:

Count by tapping your foot, raise your toe, when it hits the floor count one. When it comes back up count the and (&). So you are counting one and two and three and four and… rather than before when counting only quarter notes and counting one two three four…
Don’t play!
Sometimes when reading music you’re asked not to play and this is notated with a rest. For each note value you’ve learned so far there is a rest which corresponds to it, meaning it’s worth exactly as much as it’s note counterpart but silence takes place of any actual note.

The first one is a whole note rest, notice how it hangs from the staff line above it. After the G quarter note is a quarter note rest. After the eighth note is an eighth note rest. The last one is a half note rest which looks like the whole note rest except it sits on a line instead of hanging from it.
We are now going beyond the G major Scale. These exercises are all based on the G major scale and when done properly and often, each will help you to quickly improve your technique.
Gradually Ascending G Scale Exercise


Learning Your First Song
This first song is a good one to start with because it only has quarter, half, and whole notes. The idea is to count with a steady rhythm, playing the right notes and holding them for their proper value…that’s all reading music is!
By now you should know all the notes because you’ve learned the major scales. At least you should be comfortable with a few of the major scales such as the C and G major. This song is in the key of G major as you can see by the F# in the key signature which is to the left of the 4/4 time signature. So, all the notes in this song Twinkle Twinkle Little Star are from the G major scale.
To make things even easier I have labeled each note with it’s name directly above it. This will help the very beginner with learning to read music. Eventually you will start to know them and not need to look at the letter names above the musical notes on the staff.
Twinkle Twinkle Little Star

Counting Eighth Notes
Happy Birthday
Notice the time signature here of 3/4 (the waltz beat)
To get the 3/4 feel in your head, give yourself a full bar before the 2 beats off the top – so your count-in will be 1 2 3 1 2 play – always put a slightly heavier accent on the first beat while counting so you can really “feel” where the “one” is.

Counting Rests

Articulation
We may describe someone as being “very articulate” if they seem to express themselves well with the use of distinct words, which are expressed with clarity. We as sax players need to be concerned with the art of articulation as well because our artistic expression depends on it.
What exactly is articulation?
Articulation, in regards to playing the saxophone refers to how we group our notes together in order to get our phrases across as a musical message. This is done primarily with our tongue to either slur the notes for a smooth, legato sound and feel, or by releasing the notes in a much more separate and short way. This is the exact opposite of the slur technique and it’s called staccato.
We have three ways to operate when delivering a note or a group of notes out of our saxophone; slur, which uses no tongue and is notated with a long line over or under the notes. Regular tongue which does not use any notation. Then we have the short and very separated staccato notes which use a short tonguing technique and is notated with a dot either over or under the note:

It’s very common to see these all together in an exercise or piece of music:

You can practice your major scales three different ways to improve and expand your articulation:
Slurred, staccato, and with regular tonguing.
Dynamics
Just as articulation will help you to express different musical ideas and phrases, dynamics will help you to be even more expressive.
What are dynamics?
Simply put, it’s the volume you play at. You must learn to control your saxophone at a very low volume, an extremely high volume and several noticeable levels in between.
When practicing these exercises at different levels of volume it’s important to control the air support from your diaphragm and not your throat. We use our throat as a sort of valve by opening it up to allow for more flow of air but not as the pusher and supplier of air, that job is for your diaphragm.
In musical notation, dynamic phrases that start very quietly and build in volume are notated as such with large line marks that look like a greater than sign called a crescendo, meaning to gradually increase volume, and a less than sign called a decrescendo, meaning to gradually decrease volume. You can see these two signs in the music example below.
These dynamic terms, along with all others in musical notation are written in Italian. Words such as piano, which is marked with a “p” to mean “play quietly” and forte, marked with an “f” which means to “play loud”.
Other common dynamic markings are a combination of these:
mf (mezzo forte) = play medium loud
ff (fortissimo) = play very loud
mp (mezzo piano) = play medium quiet
pp (pianissimo) = play very quiet
Here is an example of a few dynamic markings:

The dynamic markings here are telling us to start the G quietly and gradually get louder as we approach and hit the high G, then gradually get quieter and finally play softly again on the G of the last bar.
All Major Scales and Chords
Learning Major Scales Is The Most Important Thing You Will Do!
The best thing you can do right now is to spend time learning all 12 major scales and chords.
It’s one of those things that will always be at the top of the list of most important things to do and learn. Along with long tones, these two things will make you improve as a sax player more than anything else.
I’ve included it here as a resource for now and later, and later and later! Dig in and even if you’ve just learned the basic notes start learning at least 2-3 of these easier scales like the C and G. After those are good move on to the rest. This s good and important stuff and you should spend as much time as you can on it!

Awesome Major Scale Exercise
I say awesome because I believe this exercise made a huge difference in my technique during my first weeks and months on the sax and it will help you too. Below is a great exercise because it’s simple and will help you gain technique very quickly by spending just a few minutes a day on it. The first one is written in C but once you learn it you’ll want to play it in all the keys. I’ve included 5 keys written out.
You can see the concept behind it – if you notice the quarter note on all odd numbered bars with a letter above them you see that these letters form the C scale: C D E F G A B and C.
The scale starts by descending for the full scale from middle C down to low C and after ascending it stops on the next note of the scale, which is D and does the same thing. Each time starting on the next note of the scale until it ends on the C again at the very top.
You can do this as a daily exercise for all the scales you learn. Start slow, concentrating on playing even notes, and at a constant volume. This is where a metronome is valuable.
Following the C there are a few more of them written out in D, Eb, E and F. Once you can play a few of these you will be able to apply this exercise to all the scales after learning them which can be included in your daily practice routine.
This exercise will sharpen your musical mind and give you smooth, and eventually fast moving fingers! Again, go for even notes and a steady tempo and even volume.
You should know all notes and their fingering at this point in order to implement this exercise to all the major scales. If you don’t you can refer back to the fingering section.


Awesome Major Chord Exercise
Once you can play all the major scales, congratulate yourself! This is a big accomplishment, especially when you can memorize them. As you may have already guessed, scales are one of the most important elements in learning about music, and just as important are chords. Learning chords will not be a huge learning curve since they are part of the scale. The major scale as you now know is made up of eight notes – 1 2 3 4 5 6 7 8 which are the degrees of the major scale.
So, as we know, in the key of C the notes are C D E F G A B C.
A major chord is derived from the 1, 3, and 5th degrees of the scale, therefore a C major chord is made up of the notes C, E, and G. Chords are important because we need to know and understand them for improvisation and accompany instruments like guitar and piano play them all the time.
I touched on this earlier in the scale exercise section and demonstrated it in the scale lesson videos so if you followed them you may be already utilizing the major chord in your practicing routine.
This exercise takes you through all the major chords, one going up the next one coming down. This pattern happens every 4 notes:
The first 4 notes is the C chord going up (ascending), then the next 4 notes are the B chord coming (descending).
Ascending and Descending

Descending and Ascending

The Chromatic Scale

A Great Exercise to Develop Fingering technique!
Chromatic simply means every consecutive note, so unlike all other types of scales which have different relationships between semi tones and whole tones, a chromatic scale is made up of simply playing every semi tone in a row. The chromatic scale above shows every note of the western musical system.
Playing chromatic scales all up and down your horn is a great exercise because it ensures you’re going off of every note. Some will be smooth and others not so much. Your job is to take the sections where you have problems and work them out slowly until the transition from those notes are as smooth as the rest.
Play them up, play them down, play them slow and build up your speed BUT…
Start playing the scale very very slowly, as slow as it takes to make the hardest transition of notes go by smoothly…never skim over a group of notes that give you even the slightest bit of trouble.
4 Easy Songs for Beginners
The final section of this beginner’s course is to read and play these 4 songs:
Greensleeves Lesson
Download the sheet music and play-a-long backing track before starting the lesson.
Sheet Music
|
Backing Track for Eb Sax
|
Backing Track for Bb Sax
|
Things to consider
In the video I played it exactly as it’s written on the chart below the first time through. The second time around I embellished it a little bit by adding some trills, glissandos, and changed the timing and value of some notes. Feel free to play around with it like I did but make sure you have learned it as written first!
The first thing to note is the time signature, which are the numbers 3/4 following the treble clef. This means each measure (bar) gets three quarter beats. This is the same time signature as in the previous song Happy Birthday.
The next thing to notice is the key signature. There aren’t any flats or sharps in the key signature so we can assume it’s in either C major or A minor. As stated earlier, C major is the only major key that doesn’t have any sharps or flats and A minor is the relative key of C major which is the only minor key that doesn’t have any sharps or flats.
So, how can we tell if this song is in C major or A minor?
Our first clue is that it starts with an A note, but that doesn’t always guarantee that it’s in A. Our second clue is that it ends with an A note and most of all, the note preceding the last A note is a G sharp. This is the real tell tale sign that the song is in A minor and not in C major, because…
The 7th note in any scale is a “leading note” which means it wants to lead to a resolution, or resolve. In this case the resolution is the arriving “home” at the very end which is the A. There are other leading notes in a scale that want to resolve somewhere but none are as strong as the major 7th wanting to resolve home (the root note).
Make note of all the above points, learn it and then play along with the backing tracks.
Amazing Grace
Download the sheet music and play-a-long backing track before starting the lesson.
Sheet Music for all Saxes
|
Backing Track for Bb Sax
|
Backing Track for Eb Sax
|
A few things to note before playing:
Just like the previous song this has a 3/4 time signature as well. Have a look at the repeat signs, these are the double bar lines with two dots right after the first note and another one 16 bars later on the fourth line. This simply means everything between these two repeat signs is played twice and in the exact same way.
Also notice around the second repeat sign and at the 18th bar there is a number 1 and 2 inside some lines, these are called boxes and the first time through you play what’s in the first box, the second time around after the repeat you skip that first box and go directly to the second box. These numbered boxes are a very common thing in musical arrangements.
When the melody picks up again after the second box it’s the same as the beginning except it’s an octave higher. The little sign on top of the last note is called a fermata and simply means to hold the note a little longer. In this case, until you feel like stopping.
Make note of all the above points, learn it and then play along with the backing tracks.
Over The Rainbow
Download the sheet music and backing tracks:
Sheet Music for all Saxes
|
Backing Track for Bb Sax
|
Backing Track for Eb Sax
|
Most of us probably heard this for the first time in The Wizard of Oz sung by Judy Garland, who made this an instant favorite. This song has been recorded by many musicians as diverse as jazz tenor saxophonist Ben Webster to blues rock guitarist Eric Clapton and original piano rocker Jerry Lee Lewis, making this song a true classic and standard.
Things to note before playing:
1 – The first thing you may notice is extensive use of the slur marks. If you remember from earlier exercises these mean to play each note under the slur lines smoothly without using the tongue.
2 – The check mark at the end of longer phrases is a good spot to take a breath because you don’t want to take a breath in the middle of a phrase.
3 – Notice the key signature has 4 sharps which means it’s in the key of E major. This means all notes that are F, C, G, and D will be sharps. Warming up with some exercises in E would be a great idea before playing it.
4 – Don’t worry about all the phrasing marks until you learn the notes first! After you learn all the notes it will sound ok, but when all the phrasing is in place it will sound even better.
5 – there are a couple of repeat signs and at the 7 bar rest you’ll notice a box and another below it… simply play the 1st box first time through and the 2nd box the next time around.
Make note of all the above points, learn it and then play along with the backing tracks.
Can’t Help Falling in Love
Download the sheet music and backing tracks:
Sheet Music for all Saxes
|
Backing Track for Bb Sax
|
Backing Track for Eb Sax
|
This song was a monster hit by the one and only Elves Presley who sang it in the key of D but I transposed it so you can play it in G, which goes along with most of our exercises. It has a beautiful melody and should be easier to play than some of the exercises you have been doing up to this point. It also contains the triplet figure, which we covered previously as well.
1 – Note the key signature of G, meaning all F notes will be played as F#.
2 – At the top there is a 4 bar introduction so just count 4 bars before the first starting melody note which is the G. Also, at the 10th staff line there is an 8 bar rest which will give you a little breather during the violin solo.
3 – Take note of the repeat sections! At the start of the melody you will notice a double bar line with 2 dots in front of it, this is called a repeat sign. Count 8 bars in and you will notice another one with the dots before the double bars, which tells you to play from the first repeat sign. There is another repeat section consisting of 4 bars located 3 staff lines from the bottom.
Make note of all the above points, learn it and then play along with the backing tracks.
Bonus Section To Help Improve Your Reading
Practicing With a Drum Beat
Practicing With a Drummer (or drum beat) is the Way To Go!
Here you’ll learn how and why practicing with a drum beat is the best way to become a better reader and musician. Much more helpful than using a regular metronome.
Get to Know the Drummer!
Spend some time playing and listening to this simple 4/4 beat. Try to listen to the 3 main things I mentioned:
- hi-hat
- kick
- snare
Listen and count to yourself at the same time. Getting comfortable and good at this is going to help you as we move forward with not only these sight reading lessons but beyond, as you get to play some actual songs with the play-a-long backing tracks and even with a live group.
Here is the drum loop:
Lesson 1

Practice counting in 4/4 time with the drum beat loop below:
© 2020 How To Play Saxophone. All Rights Reserved
listo para lo que sigue
I've been playing for awhile but I do need to do more to develop skills. And techniques. Enjoying the lessons.
I have been playing for a lot of years but it still wasn't a waste of time
I have been playing for about 6 months. I play Guitar and Piano, so lots of the lessons in theory I already know. So I am ready for the the next lesson. But if I did not know the lessons, it would be very important in moving forward.
thanks, good luck moving forward....any issues or questions let me know.
You kept it simple and easy to understand. I had previously downloaded the tracks for these song, so didn't need them here.
Thank you Johnny. It is going fantastic. You are a great teacher!
Thank you Johnny. I love these songs. They are fun to play and perfect to be abler to use what I am learning so far. I see great progress and much more coming.
yes, it keeps getting even better...congrats on your progress so far!
Thank Johnny, great lessons. I'm still beginning, but starting to see good progress.
good to hear Patrick. These beginning lessons are super important as they are the very foundation so take your time.
Great lessons and lots of homework. You are a great teacher and I feel very content and convinced that I will be an accomplished sax player because I have found the right teacher. Thank you my friend.
good to hear Francisco...I also feel confident you will too! Always here to answer any questions so keep it going.
On the major G scale, concerning the 'D' note do you use the octave with it or not?
yes. every note after C# needs to have the octave key down.
The lessons are great. Keep the coming. You are spectacular Sir
you got that right James!
Good review even for old 71 year old sax player. It’s amazing how we get lazy in our playing. Always good to go back to the basic fundamentals. Sight reading seems to always cause problems . Should be taught more , rhythm is one of the keys to music.